
Installation Manual (Full)
Before Installing Your Loocam System
- It is recommended that this device is connected to a surge protector in an effort to prevent electrical damage caused by power surges.
- This device is designed for continuous 24/7 operation. It is recommended that you plug this device into an uninterruptible power supply. An uninterruptible power supply contains an internal battery that will keep the device running in the event of a power outage. If you are unsure whether or not you have an uninterruptible power supply please consult an electrician.
- Plan where you are going to install the cameras before starting the installation process.
- Only use Loocam recommended accessories.
- Try to install your cameras between 8 ft (2.4m) and 15ft (4.5m) above the area you are monitoring. A higher viewing angle will increase the amount of area you can monitor, and will prevent opportunities for tampering.
- On some televisions or monitors, the "Overscan" function may prevent the whole image from appearing on your screen. Please disable this function in your television or monitor's menu screen. You may need to contact the manufacturer for more details.
- Place your cameras in a visible area to let people know your property is being monitored. This can also act as a deterrent for criminals.
- While our camera lens does it’s best to reduce glare it can’t prevent it completely. Try to ensure that your camera is not pointed at a direct light source.
- Standard Loocam cameras are packaged with 60ft (18m) of cable. If you require more length you can purchase 60ft or 120ft extensions

Please reference the Quick Start Guide packaged with your LooCam DVR during the installation
Mounting The Cameras


If you are placing the mount on a ceiling
Rotate the mount on the back of the camera 180° by loosening the screw at the base of the mount, using the packaged hex key. Once you rotate the mount to the intended position tighten the screw by turning counter-clockwise.
If the mount is being installed on a wall or flat surface you do not need to rotate the mount.
2. Place the mounting bracket where the camera is being installed. Ensure the camera is installed no more than 60ft (18m) away from the DVR, unless you have purchased additional cabling.
3. Using a Phillips #1 screwdriver or electric drill, mount the camera to the wall or ceiling, turning all the screws clockwise.

4. Please ensure that the mounting bracket is secured tightly to the wall


5. Adjust the viewing angle of the camera to your desired preference by using the hex key packaged with your LooCam device. Loosen the screw by turning counter-clockwise, and tighten the screw by turning clockwise.

Connecting The Cameras to the DVR
1. Unravel the Camera Cable and separate the two ends. Each end should contain one BLUE video connection and one RED power connection
2. Locate the PURPLE stickers attached to the wires with the BLUE connection.
- One sticker should say “Connect to Camera”, the other sticker should say “Connect to DVR”
 and connect it to the BLUE connection attached to the Camera.
 Your Loocam device features a security lock on our Camera Cable which will lock the cables in place ensuring a safe and constant connection. Line up the pin, push in and turn clockwise.
 ![]()
Locking Mechanism
4. Take the RED power connection from the Camera Cable, and attach it to the RED power connection attached to the Camera.

Connecting the Camera to the DVR
5. Take the BLUE connection that has the  sticker and connect it to the back of the DVR under the desired channel.


Don’t forget to use the security lock. Line up the pin, push in and turn clockwise.
6. Take the RED connection attached to that same cable, and connect it to one of the ends of the 4-to-1 Power Splitter.

7. Connect the other end of the 4-to-1 Power Splitter to the Camera Power Adapter.

8. Repeat Steps 1-7 for any additional cameras.

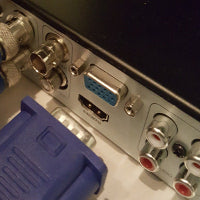
Connecting the DVR to a VGA Monitor


The Left Mouse button is the primary button you will use to make selections within the DVR's menus.
The Right Mouse button is used to bring up the Quick Menu and to return to the previous screen.

Please ensure that you are using the mouse on a non-reflective surface, such as a mouse pad, as reflective surfaces will interfere with the mouse's optical sensor.